Oct 10, 2013

FunSchool is Cool


Hey everyone just wanted to share a few little entertaining things we did this week in our homeschool. We had a pretty busy week outside of the house this week with an illness in the family so most of the week we just stuck to the basics reading, writing, and math. But saturday we had a little extra time to spare after our soccer game so we did two fun projects, the first one we have been working on the parts all week and we finally got it put together, and the 2nd was a life cycle activity that I found in our science text.

Lapbook

Since school started we have been working so hard on the addition chapter of our math book so once we got finished and took the test I figured we needed a little math fun so I went looking through all the fun math related freebees I have been collecting forever and found this A Circus of Math Lapbook I downloaded from CurrClick. (I guess I had a coupon for it because now it is 7 bucks.) The file comes as a 61 page download it includes everything that you need to create fun mini books for the 1-9 addition facts as well as 3 math games with directions describing how to put it all together. The only extras you will need are a couple of file folders and paper. I just printed mine of regular copy paper (because that is what I had on hand) but it will probably hold together better with cardstock, the lapbook pieces are all in black and white so it would also be eye catching on neon cardstock.  
 Most of the things I cut out because it was a lot of little pieces and plus I did it at night when the kids were sleeping. There were a few things that I let Olivia cut out and then I let her fill in the answers to the math fact problems and we glued or folded each book together.  I think that each day we did 3 books and then today we sat down and got our file folders out and refolded and glued all of our pieces together. This was a great way to practice the math facts and also we can use it as a fun resource we will be able to utilize when we start memorizing these facts.

 Metamorphosis

This week we learned a little about the life cycle of Insects and found this project in our Science text (see this post for the link to the free science text we use). We used construction paper strips to make a model of the 4 stages of a butterfly life cycle.
eggs


caterpillar                     chrysalis

 
butterfly
Olivia had fun doing this project (but she thought the strips would make better bracelets)
 
Although this week has been a little tiresome I am so blessed to be homeschooling. The school work may not always get done at “normal” school times but we were able to get plenty of learning accomplished.
 
What do you do when life puts a bump in your homeschool day?

-Becca
*****I just love going back and looking at how much fun we have during our school time it puts my mind at ease when I feel like things are not going as planned****

Oct 5, 2013

My weight loss journey


A WEIGHT LOSS JOURNEY

By Debra Sumner
I would like to tell everyone this has been a quick and easy process for me but that is not the case. I have been on one diet or another off and on my whole life. Losing then gaining back more. I was to the point were I didn't care and I really got up there in weight. I just found something today that said I weighed 240 lbs. It was from several years ago not sure when. I started this weight loss journey April 2012 weighing 219. I might have weighed more because I was "semi dieting" already. I don't know what made me decide "this was it" but the first thing I did was cut my soda drinking off. I woke up to sodas and went to bed with them all day everyday. I am proud to say I haven't had more than a sip since April 2012. I am a water drinker and an ice eater. I go through about 2 bags of sonic ice a week. Plus when I am out I get a large water with extra ice several times.
 
My favorite way to get exercise has always been walking. But though the years I started having problems with my feet. Every time I would start walking and losing weight I would start having problems. Then later on when I got way over weight I started having problems with my legs, hips and back. So of course I didn't want to do anything that would hurt me and put me in bed. Well I decided to see what I could do. I figured any movement was better than none right! So I secretly started doing a small amount of what I call bed exercises. I would lie in bed and do any kind of movement that didn't cause me pain. I also did things like when brushing my teeth or hair I would do heel to toe exercises. (Don’t no the names so I made up my own. LOL) when sitting I would also exercise by heel to toe and any arm exercises I could think of. I never did them in front of anyone always when I was alone. I was embarrassed but determined.
 
When I found I didn't have a lot of energy and I couldn't control my appetite I went on the search for something to help me. I tried a lot of different diet aids. Most made me feel just a little off so I moved on to another one. I was on a mission to make this work. I am not one to stay with one thing for long anyway. I can't even stay with the same exercises. I have to at least mix up the order, anyway getting off track. I finally found a couple things that work for me so I mix them up and they help me keep my appetite down and for the most part give me enough energy to make it through most days.
 
Back to my exercises I started telling a difference and started losing some weight. One morning my husband caught me doing my bed exercises and laughed at me. He is the type that thinks no pain no gain. Well I am here to tell you I can do without the pain.  He is not laughing now. I did it my way and at my pace and it has been slow but I have not given up. I am not skinny but I feel good. My ideal weight is probably around 100 to110 but that is not my goal. I am going to try for 150. I am able to walk again with the help of orthaheel shoes. I have some pain some times, and have to stop for a few days, but so far not enough to make me quit.
 
I am staying between 159 and 162 right now. Which I think might be because I am walking more and building more muscle mass (that’s what I am telling myself anyway) I am slowly changing my eating habits. My favorite sweet use to be ice cream; now I love whipped cream in the can. They have chocolate flavor at Brookshire Brother and it taste like chocolate ice cream. Sometimes I put it on top of pudding in a cup. mm mm. I love grapes right now and keep a bowl full handy for walk by munchies. 
 
 I still have cake and ice cream at parties, eat extra butter popcorn now and again, and fried foods too just not as often. I am really fighting with chili cheese French fries from sonic right now. I try to share with the kids so I think I am eating more than I am LOL. There is so many things I have done on my journey I can't even remember all of them. Is all I know is I didn't take the fast track like before so I hope it will be a life change this time and I won't slide back into my size 18- 20 clothes.(which I got rid of)

So this is my words of wisdom I would like to pass on to you:

Do not worry about how your suppose to do it. If you do an exercise and it causes you pain try it a different way. Any movement is better than none (even if you have to sit or lay to do it). Make up your own program as you go, change a few things at a time.
 
Set small goals. Try different things. If it does not work change it. It’s your body and your choice. It’s your plan, do what works for you. One week it might be one thing and the next something different all together if it works do it. I don't even think it is important to stick to one plan of action forever do it while it works and then when it stops working change it.
 
Do not completely do away with everything you love it wont last; I don't even realize sometimes that I haven't had certain things in a long time unless I sit a think about it, which I try not to do, (that's where the extra butter popcorn came in. LOL) The first time I went to the movies and didn't get a large coke it was really weird but I still have my buttered popcorn. The only thing I completely got rid of was Pepsi. I am afraid that I wouldn't be able to limit myself (plus they make me swell) everything else I just don't eat as often or as much.

I hope this made sense and helps someone. My journey has not ended and may never end but I hope and pray that it will always be a journey that I can control.

Love to everyone,

Debra Sumner


Sep 25, 2013

Then there is the 2 year old.

I love for Edward my 2 year old to be with us when we do school almost as much as he loves doing school with us. I know  that it would be a lot easier to just wait and do school while he is taking a nap (but I like for this time to be quiet time for everyone in the house) or while daddy is home so he can keep him out of the way. And don’t get me wrong there have been countless  days that we have had to put school on pause because Edward was not being very cooperative but most of the time he sits with us at least some of the time we are doing school so I always make sure that I have some things for him to do.  

 Gradually over the last few months I have been creating more and more activities that are fun but challenging to keep him busy while big sister and I are doing school.

Pom Poms
He does all kids of things with these fuzzy little balls. At first I was letting him play with some that are stuck to magnets along with some letter and number magnets on a dry erase board. Then I poked a hole in the top of the container that is holding all of his stuff and he would pick out the balls that would fit and poke them there the hole. After that I gave him some plastic tweezers that came out of some toy the kids had and he picks up the poms with the tweezers and put them in a cup. Theese simple fuzzy little balls bring countless minuts of quiet jabbering from him *lol every minut helps*.

Bingo marker
He loves that thing! He wants to dot everything,  so I always make sure and have plenty do a dot pages printed out with letters numbers or shapes. At first the marks were everywhere and slowly but surely they are more and more just getting on the circles.

Fish/fishing pole
For this I took one of the poms stuck to the magnet (bait) and using thin paper wraped wire (maybe for fake flower arrangements or something? I am not sure it is something I found in my moms craft supplies) and glued it to the end of a wooden dowel then I cut fish (at least he coud tell  they were fish) out of construction paper and used  a small paperclip for the mouth.

Matching puzzle
The latest thing that I have created for him is a color and shape matching game I started in my word processing program and created one page with  9 colors (red, orange, yellow, green, blue, purple, black, brown, and white) in rectangles with the word written on it just so he can see the word not that he can read it.  And then another with 3 shapes (circle, square, and triangle) I printed out two copies of each on card stock and laminated them one copy I left whole (game board) and the other I cut out each color or shape (pieces). When we get ready to play he picks up a picece of the puzzle that I have cut out and I tell him what it is (some times he tells me) and then he finds where on the board the piece matches. I have noticed he can most of the time say witch shape is witch so soon I will have to add a few more shapes.

Oh and on a side note I think that I am going to make a game like this for Olivia except on the board just have the color word and on the pieces take the word off. I think that it would be a fun way to practice reading her color words.
I have been visiting a quite a few Montessori based websites and loving all of the fun ideas that they share for the tot to preschool aged kids to make learning fun. Most of it is simple using objects that most people already have around the house.
There are also toys that I know will keep him busy and quiet for a little while sometimes when he gets tired of sitting with us I will get out the blocks or the train set and he plays by himself for quite a while.


This is a few things that I use to make school time a fun and enjoyable time for my entire family. I would love it if you could share some of your ideas on this subject in the comments below.
-Becca


A short stop in Ancient Egypt


As I have shared before I did not buy a History/Geography curriculum for Olivia this year for a few reasons but mainly because I want to mostly focus on the 3 R’s this year, but I do want to introduce her to some things that I think she would be interested in so for the last week and a half we have been studying Ancient Egypt and it has been fun.

I found this Ancient Egypt unit study from RoyalBaloo.com she wrote it for her 2nd grader so there is some things in there that I did not do with Olivia but we picked out the things that we would like. I love that everything is included with this unit study. I do plan on writing unit studies for us for later and this one was a very well thought out plan and a great inspiration. **Thank you Erin at RoyalBaloo for sharing all of your amazing stuff**.

The Ancient Egypt unit study is a free 22 page download that includes 2 mini books and tons of worksheets covering everything from Ancient Egypt Geography and the Nile River to the daily life an Ancient Egyptian kid, and everything in between.

The first week we learned a little about the geography of Egypt and the Nile River and Sahara desert. The download included a worksheet to write the definition of a desert and draw a picture so I used that sheet for some Dictionary practice and showed Olivia how to look up words in the dictionary.

The second week we learned about hieroglyphs and pyramids and even built a pyramid out of rice crispy treats. Olivia really enjoyed that. We still have pharos, and mummies that we have not gone over but by the middle of the second week Olivia was over the whole ancient Egypt study and to tell the truth I was as well so we ended our study there. I still have the extra stuff in our notebook so that one day when we are bored and need something fun to do we can pull this out and learn something new.

I also found this Ancient Egypt printable pack at 3 dinosaurs it included pintables suitable for tots to 1stgrade level. Like with the unit study I went through and picked out things that I though that my kiddos would enjoy. I printed out lots of do-a-dot pages for Edward, a color mini book with scarab beetles and several 2 piece puzzles. For Olivia I printed out a 100 chart color by number and a 10 piece count by two puzzle. I also added the greater than/less than sheet and the addition sheet to her daily calendar notebook.

Besides the do a dot pages Edward was not happy with the Ancient Egypt theme, he would not even color the mini book or play with the puzzles he wanted his dinosaur things that we did the week before. But just like with Olivia, I will put all the stuff we did not do up and pull them out another time and maybe he will enjoy it more.


Along with the pintables that I found online I also went to the library and checked out all the books that I could find on Ancient Egypt and all our read alouds from the last two weeks came from one of those books. Olivia really enjoyed the myths and legends from the book Ancient Egyptian Civilization by Michael Bell and Sarah Quie .

This is not everything that we did it is just what stuck out in my mind and the things that we got picturs of. I can not wait to figure out where our next stop in history will be.

Come back next week and I will show you some of the fun things that I am doing with Edward my 2 year old to keep him occupied while we do school.
-Becca

Sep 18, 2013

pre-k and kinder for free!!


When I decided to homeschool Olivia I knew that I did not want to have to spend a lot of money for preschool and kindergarten. It was so much fun searching all over the internet for the perfect ideas for fun and educational activities for my then 4 year old. I have had several people recently asking me about what I did with Olivia so I thought I would take some time and share some of the websites that put Olivia through pre-school and kindergarten for almost free, all I had to pay for was copy paper and ink.

Theese first ones have free printables

schoolsparks

First School


Kids Learning Station


Free interactive web sites for letters and phonics

starfall
Reading Bear

Olivia really enjoyed the you tube videos from

Have Fun Teaching

I got alot of my preschool craft ideas from

DLTK's

Phonics
Fun Fonix

Progressive Phonics

I am sure that there are more but those are the ones that I remember using the most
Last year I started using alot of things from

1+1+1=1 Confessions of a Homeschooler

want free things in your e-mail sign up for

free homeschool deals

So there is my list and I hope that this helps someone in there homeschool journey
-becca

Sep 9, 2013

update on my journey to a more organized life

A while back I wrote here about needing a way to organize my though so that at night when I am trying to sleep I could get there faster. I thought maybe if I could get all my ideas down on paper with some problem salving pushed in there maybe my sleepless nights would be a thing of the past. Well I am here to say that was a complete failure.
I must also say that I still don’t know if it would work if I gave it a shot but I could not get into it, oh and you should have heard some of my excuses. First I had to go out and buy a cute new notebook (because we all know there is no form of paper in my house) to put my thoughts in well that never got done, I never thought about it when I went to the store. (I know I should have wrote it down lol)
Every night I would put the kids in the bed and think now lets do it and then I would think nah I want to just forget about worrying for a few hours and watch TV thinking I would do it latter. Well later never got here and before I knew what happened it was midnight and I had to get into bed.
But I have been doing one thing to try and help myself and that is get into a routine during the day in the hope that if I feel like I am getting things done during the day then there will be less things to worry about at night. I have also been making myself get up a little earlier in the mornings but it has been super hard to beat the kids up.
Anyway, even though what I tried this time was a big bust, I will keep trying and maybe next time it will stick. 
 
-Becca

Sep 8, 2013

Swirly Chocolate Sandwiches

Hey everyone, I am super stoked to announce I finally found a sandwich Karli will eat!!!  I'm calling it Swirly Chocolate Sandwiches. I think the name alone is the main reason Karli likes it. The best thing is it isn't chocolate I am using, it's Nutella. I figure what Karli doesn't know won't hurt her. (And may actually help her)

   The only things you will need is a rolling pin, bread, Nutella and a knife
First you cut the crust off the bread and roll it flat with a rolling pin

Spread on the Nutella and roll it into a sushi roll.


I cut mine into bite size pieces
The cute swirl of "chocolate" ;)

 
If anybody has any cute school lunch ideas to trick my kid into eating PLEASE let me know
                                                                                                -Sarah


Aug 30, 2013

First Week of School Kinks

Good Morning, I am sitting here with my cup of coffee on this Friday morning and decided to make a quick post about Karli's first week of school. Other than my one freak-out on Monday it has been a very smooth week. There are only a couple of kinks I have to work out.


FIRST DAY OF SCHOOL


1.Her lunch, my daughter is a very picky eater and will not eat cafeteria food. I feed her before she leaves and send her a lunch but she never eats it and she comes home starving EVERYDAY!! She doesn't like sandwiches or lunchables. I've sent chocolate pudding, grapes, apples(she loves apples)and she didn't eat any of it. I need some ideas to what to send with her.

2. Also balancing my work and Karli's school schedule. School is from 12:15-3:15 and I usually work 10-4. I have to get somebody to drop off and pick her up.


I am super excited for Karli because she likes her school. I am sure it won't take long and I will have it all figured out :) BUT If anybody has any pre-school advice I need all the help I can get.
                                                                                             -Sarah

Aug 26, 2013

Our year so far...


We just finished our 3rd week of our new school year and I though I would share a few things with you all and tell you how we are doing with the curriculum we decided on this year. You can see my post on that here

Road Trip USA


me on the map idea found here
I have found out that this one we are not ready for just yet, I have looked it over and loved the idea of it but when we put it into action it just was not for us. There is a lot of writing that Olivia is just not ready for that yet and she really was not interested in the topics as well so we will save this one for later when she is a bit older.

When I decided to drop Road Trip USA I had to figure out what we would do for Social Studies and History this year.  While at the library I found a book called “What Your 1st Grader Should Know and went over the Geography and History section and picked out the topics I though Olivia and I would enjoy and I am going to find some fun ways to teach each topic.  We had so much fun learning about maps last week I think that this is just what we needed.  It is going to be a lot more involved with me figuring out the lesson plan each week from scratch but it will also be a lot of fun.

Math Mammoth


This one I was a little scared of because it is math and while we have done really well teaching her numbers and counting and even started a little addition I though I was going to need a scripted program, I did not know how I was going to explain to Olivia the hows or whys for the concepts in math but so far it seems that Olivia learns just like I do so us working the teaching section together she picks it up pretty easy and I love the games that the author suggests. I know that it will get harder but for now we love the curriculum that we have.


Explode the Code


playing a game using flash cards
I love this workbook, it is hard enough that I feel like Olivia is learning something but not too hard that I have to sit over her the whole time she is working on it.

I also like that each lesson we have done so far has a little grammar work as well in the teachers book. This was something that I have not figured out what I am going to use to teach so I am glad that we are getting little work in each week for now until I find a grammar book.

I have also made flash cards and word games to go along with the lesson because even though Olivia loves to do the worksheets it “clicks” better when there is some fun thrown in there.


Elementary Life Science

This is another book that we are loving, we are slowly working through the book we started it last year.  Reading the text and answering the questions together. To be honest it has mostly been me reminding her about the answers. A super exciting thing that happened this week though Olivia got a lot of the answers correct with out any prompting from me.  whoohoo!! The experiments and activities in the book are super fun so we are enjoying learning science.
 

Other things


We also have done a couple of lesson in our just right mini lesson book this is one thing that I am so-so about but we are going to stick with it for now. 

Olivia still enjoys working through the you can read lessons so even though it is mostly too easy for her it is good to get the sight word practice in so  I let her work on that as she wants to.

Right now my main focus is on reading and math I know if she gets the basics of those two things down she will do well with what ever life or school throws at her. The other things while still very important in the long run are just an added bonus right now I am trying to make it fun and keep it pointed to things that she is interested in. 

This year is our first year to join a co-op and we had our first outing that was really fun thank you FFHSC for making us feel welcome. Another new thing going on this year Olivia has joined a soccer team and we have enjoyed meeting new friends through that as well
 
I am still looking for a good handwriting and grammar program so if anyone has any suggestions let me know in the comments down below.
-Becca

Aug 22, 2013

Easiest dessert ever made

One of my all time favorite desserts my mom always made for get-togethers was her fruit salad. It's easy and something about it is addicting. I am actually making it right now for a small BBQ I am having at my house. The only ingredients you need for a basic fruit salad is fruit cocktail and whipped cream(which is what I eat it at home alone for a quick sugar high)!!!You can add more things like cherries, nuts, apples or pineapples for extra yumminess.
I do something different every time but for today's I am mixing
 fruit cocktail (make sure you drain the syrup first!!!), cherries (cut in half) 1 chopped up apple and whipped cream. I then put an extra layer of whipped cream on top (just for looks). A layer of crushed pineapples. Decorated with nuts cherries and chocolate syrup it took 10 min and I was done!!!
I hope Ya'll enjoy this easy fruit salad. Let me know what your go-to quick dessert is.
                                                                                                   -Sarah
Finished Results!!!
 
Ingredients used
 (I didn't think to take a pic till I was almost done.Sorry about the empty containers TYPICAL ME)    :) :) :)

Aug 19, 2013

Journey to a more organized life


Yesterday Charmaine talked about chaos and organization here this is something that I have a lot of issues with.  Not as much in my home but in my mind *don’t get me wrong my home is a mess but it is not as distracting to me as my thoughts*

I have so many ideas of things that I want to do or try, it just gets jumbled up and I end up not getting anything done. Even while sitting here trying to write this post my mind is racing about all the other things that I could write about or could be doing. It gets so bad that I can not get to sleep at night. I just can’t get my mind to slow down.

So my thoughts are where I am going to start my journey to a better organized life. Now I just have to figure out how to slow down my overexcited mind.

After a few days of research I have found a few ideas of what I can do to try and slow this mind down. The first thing I am going try is every evening after my kiddos go to bed I will write down everything that I am thinking about, or worrying about and write down one thing that will help me stop thinking about it. I will try to write down a solution to the problem, or one thing that will get my thinking into an action.

I guess we will see how it goes. If you have any ideas about what I could try please leave a comment below this tired mama is willing to try anything.

-Becca

Aug 17, 2013

Adios Chaos

 
Chaos - a total lack of organization or order
Wow! Don’t we all have a little bit of CHAOS in our homes? From a whole room full of it, to just a closet. There is a feeling of “ughhhh” every time you see it, and the overwhelming thought of “I just can’t get organized”.
I am here to tell you that YOU can do it! One of the easiest things for me to do is throw stuff away. I have no hesitation or second thoughts. I actually enjoy throwing things away. I do a happy dance and everything. lol But I realize that there are a lot of people that just can’t let go of things.
If you have a desire to get organized, I have a few personal tips that you can use. In a few steps you can be well on your way to having a chaos-free home.
1. Get rid of extras
De-clutter before you organize. Start with a BIG trash bag and lots of patience. I admit it can feel overwhelming at first, but just take a deep breath; then take your time. If it helps, do a little bit everyday. No need to try to tackle it all at once.
Ask yourself these two questions to determine if you should keep an item.
1. Do I really, really LOVE this?
2. Do I really NEED this?
If your answer is no, or maybe, then get rid of it! Take it to Goodwill, have a yard sale or just throw it away.
We tend to keep all kinds of stuff thinking that “one day” we are going to use it or need it, and we end up with piles of unused clutter. At the end of the day, we can’t find anything. Months or years go by and we don’t even know what we have. So, I say if you didn’t even remember you had it, and you lived fine without it, then let it go. Of course, there are sentimental items that don‘t fit any criteria, such as pictures, special memories, your kids’ school art, cards, etc. If it’s very special to you, then it should stay.
2. Organize and Store
Everything must have a place. Start by separating your things and categorizing them, then decide how and where to store them in a place which is practical for you. You can use things that you already have at home, such as plastic containers, drawers, a flower pot , tin cans, mason jars or shoe boxes! Use labels to help you remember where everything goes. Utilize your shed, attic or garage for the long-term storage items that do not need to be kept handy.
Remember, it doesn’t have to be flawless; just make it your personal preference. The only right way to organize is how you want it. Different people have different styles and needs. Do what works for you!!
3. Maintain/Prevent
When you are finished, look around. Enjoy the “Oh, it’s finally done, and I am feeling so good about myself” moment. Cherish it, and don’t forget it.
It’s really easy to let things get out of hand, again. So stick with it, maintain the order, try your best to put those scissors back in the drawer, and promise yourself to try not to keep every empty box, sale paper, etc.
Strive to make it your routine to always put things back where they belong. And remember… you don’t need to keep EVERYTHING!
I hope these tips can help you. If you have any tips that you can share, feel free to comment!


Aug 14, 2013

Olivia's first day of first grade


All summer I have been planning an exciting back to school day for Olivia, usually we just start school but this year since we are going into first grade I wanted back to school to be a celebration.  We talked about it all week and we were both super excited when the day finally arrived.
 
 
 We started back to school last week and it was a hit.  I think that we are going to have our best homeschool year yet.  We started off our morning with a very short photo session Olivia was not to into it so she only let me snap a few pictures. Then we put her daily calendar activities into the binder that she got to pick out.   Then we decorated her math binder *stickers really are all we need to have a good day*

Olivia’s favorite thing of the day was making an abacus. It really was a lot of fun, and super easy all we used was beads kabob sticks and big popsicle sticks.

We also had our first trip to the library her eyes lit up when she saw all the books everywhere. I showed her how to pull out the books where she would know where to put them back if she looked at it and decided she did not want to take it home. We went over the library etiquette and Olivia was able to get her very own library card. 

            There was one more activity sheet that I created and intended to do, it was a first day of school questionnaire, but my computer got a virus and I could not get it printed out so I guess I will turn it into a “whoohoo I am 6 questionnaire”.


Since we practically do school year round I think that celebrating the first day of a new school year is a good way to start fresh, and I can not wait to keep this tradition going and growing. 
Edward enjoys doing school with us as well


What kind of things do you do to make going back to school fun for you and your kids?

Aug 12, 2013

Planning a Mickey Mouse Birthday

First Birthday Idea
 
Kullen is turning 1 in a couple of months  and I am planning him  a Mickey Mouse birthday. There are so many birthdays in my family I really don't want a big cake. (except his smash cake of course) So  I decided to have a Buffet of Mickey Mouse snacks. I found fairly cheap mickey mouse cookie cutters from amazon and I want to cut out tons of snacks in the shape of  Mickey Mouse....Here are a few other ideas I found.


I love the look of these cake pops from pops.emmaslunch.com

(To learn how I made some yummy cake pops click HERE)


I'm planning on making party hats for lots of pictures. I love these from the wallace family blog


 Grill Cheese Mickey Mouse will be awesome snacks. I am also thinking Mickey Mouse peanut butter and jelly sandwiches will be a great alternative and that could be made the day before.


 This Cute DIY project I found from pinterest would be good for decoration and a cute treat box.


Isn't this the cutest idea ever from catchmyparty.com!!!!


Wish me luck and I'll let everybody know how its going when it gets closer  to October
                                                                                                                                       -Sarah


Aug 10, 2013

Birthdays

I had such a good time planning my kiddos birthday parties this year I though that I would share a little of it with you.

Olivia’s birthday is in January she turned 5 this year and we had a wonderful tea party complete with pretty frilly tutus and jewelry. 

This was a fun party to plan we found fun shaped clear plastic plates and little clear plastic cups and decorated them with beautiful scrapbooking paper add in coordinating paper fans in the shape of a tea pot and mini spoons and forks .
Her cake was petit fours covered in green and pink candy melts. We had a good time playing dress up and letting the girls do makeovers. The day was sunny and perfect


We just got finished with Edwards birthday in July, for him we had a race car party, we had a pit stop table that included hot dogs, Oreos for spare tires, dipsticks made from pretzel sticks dipped in chocolate and our nuts and bolts consisted of a peanut butter trail mix. I made a photo booth completr with a homemade car cut out for the kids to drive. (Big thanks to Grace for that) l could not find a race car theme plates and cups so I also made his from clear plastic and added decorations myself. Even though it rained from the time the party started to when it finished we still had a good time and it helped with the heat.


Do you plan big partied for your kids birthdays?


Aug 2, 2013

Homemade Laundry Detergent

Original Recipe found online
I have looked at so many different places not sure where I found this the first or who made it but thank you!

1 bar Fels-Naptha soap ($1 per bar)
1 cup Arm and Hammer Washing Soda ($3.00? for 55 oz)
1 cup 20 Mule Team Borax ($ 3.38 for 76 oz)

All of these things can be found at Wal-Mart or any store like it in the laundry isle and beside the soap each box will do several batches of soap
The recipe says to grate up the soap as small as possible (We used food processor but you can use a cheese grater) then stir in the other two ingredients and use 1-2 tablespoons per load.
We have been using this soap for about a year now with no problems it cleans the clothes really well and does not leave any scent. I have also read online that since it does not make a lot of suds it is ok for HE washers (not a professional so could not say for sure, but it has not messed up ours) 
I also put about ¼ cup of vinegar in the fabric softer dispenser of my washer to soften and deodorize clothes. 

Today mom and I made some more of this detergent up and decided to tweak it a bit so here is what we used.
 
6 cups Arm & hammer Washing Soda  
6 cups 20 mule team Borax
1 bar Zote pink
6 bar Fels-Naptha soap
¾ ml Tea tree oil in ½ of batch
Lotus blossom and vanilla fragrance oil in ½ of batch
6 cups Epsom salt
Measuring cup
Knife
Food processor 

 
What we did

  1. cut up bars of soap so that they will fit into food processor 
  2. Put in 1 bar of Fels-Naptha soap and 1/6 bar of Zote. turn on processor and grate until all the pieces are small
  3. add in washing soda and borax and mix until well blended (he had to do one batch at a time because that is what would fit into my processor)
  4. I also added ¼ ml of tea tree oil to each of the first 3 batches. 
  5. After all 3 batches were made we put in 3 cups of Epsom salt and mixed in really well.
The 2nd half of the soap we did not put in tea tree oil but added 9 drops of vanilla and 21 drops of lotus blossom
      After mixing everything in it still did not have a very good scent of the vanilla and lotus blossom so I took 4 cups of detergent out and added in 14 more drops of lotus blossom and 9 more drops of the vanilla
I hope that this is not to confusing we have decided to just add the scent drops after we fill up our containers so we could add what scent we like and how much we want.  
I also will not be using the vinegar this time because we added in Epsom salt. We have not used our tweaked recipe yet but I will share a review post when we have used it a while.   

What each ingredient does for the soap

Washing soda is a detergent booster
Borax is also a detergent booster, it fights stains, softens hard water, and gets rid of any odor. 
Zote brightens clothes,
Fels-Naptha is a stain fighter
Epsom salt is a fabric softener.  

If you try out our recipe or have you own tell us about it in the comments below.
 
-Becca & Debra

A soapers review...

After being able to use both batches of our soap for about a week now I can say that I love it! It turned out fantastic.

The first batch (see here) is a beautiful yellow color and is tea tree and vitamin E oil.  This batch we used cold process and had to let it sit in a closet for 3 weeks (boy was that a long hard wait) the soap turned out so good it is hard and has lots of creamy lather. It also cleans really well and rinses off clean (it does not leave any soapy residue like some soaps can).  

The second batch (see here) is a very natural looking brown color the lilac and lotus blossom gives it a very soft sent that is very soothing.  This bar we let cure for 1 week it is a little softer than the first batch but hopefully the longer it sits the harder it will be. This one also produced a very rich lather and rinses clean.  I have also enjoyed using the oatmeal honey almond soap it is a very good exfoliating bar. I do think that we will have to grind up our oatmeal a little bit more next time the pieces are kind of big.

I have also tried to use it as hand soap and at first it dried out my hands when I used it too often but now that I have used this soap exclusively for a couple of weeks I don’t notice any dry skin.   

I still don’t know if hot process or cold process is better some things that I noticed about each, cold process looks smoother like a bar of soap from the store looks and our hot process looked rawer, not perfectly smooth it had bumps and dips (this could just be our soap though?) The Hot process soap got done a whole 2 weeks faster than the cold process although not quiet as hard (yet).

I also learned that saponification is the chemical reaction that happens between the lye and the oils that turns the oils into soap. (whoohoo)

Anyway I am by no means an expert at soap making but I do know that it is fun and if you are looking for a more natural soap then this could be your solution.

Jul 31, 2013

Medium Chunky Salsa

Salsa Recipe

(A tweaked borrowed recipe)

Little story about recipe

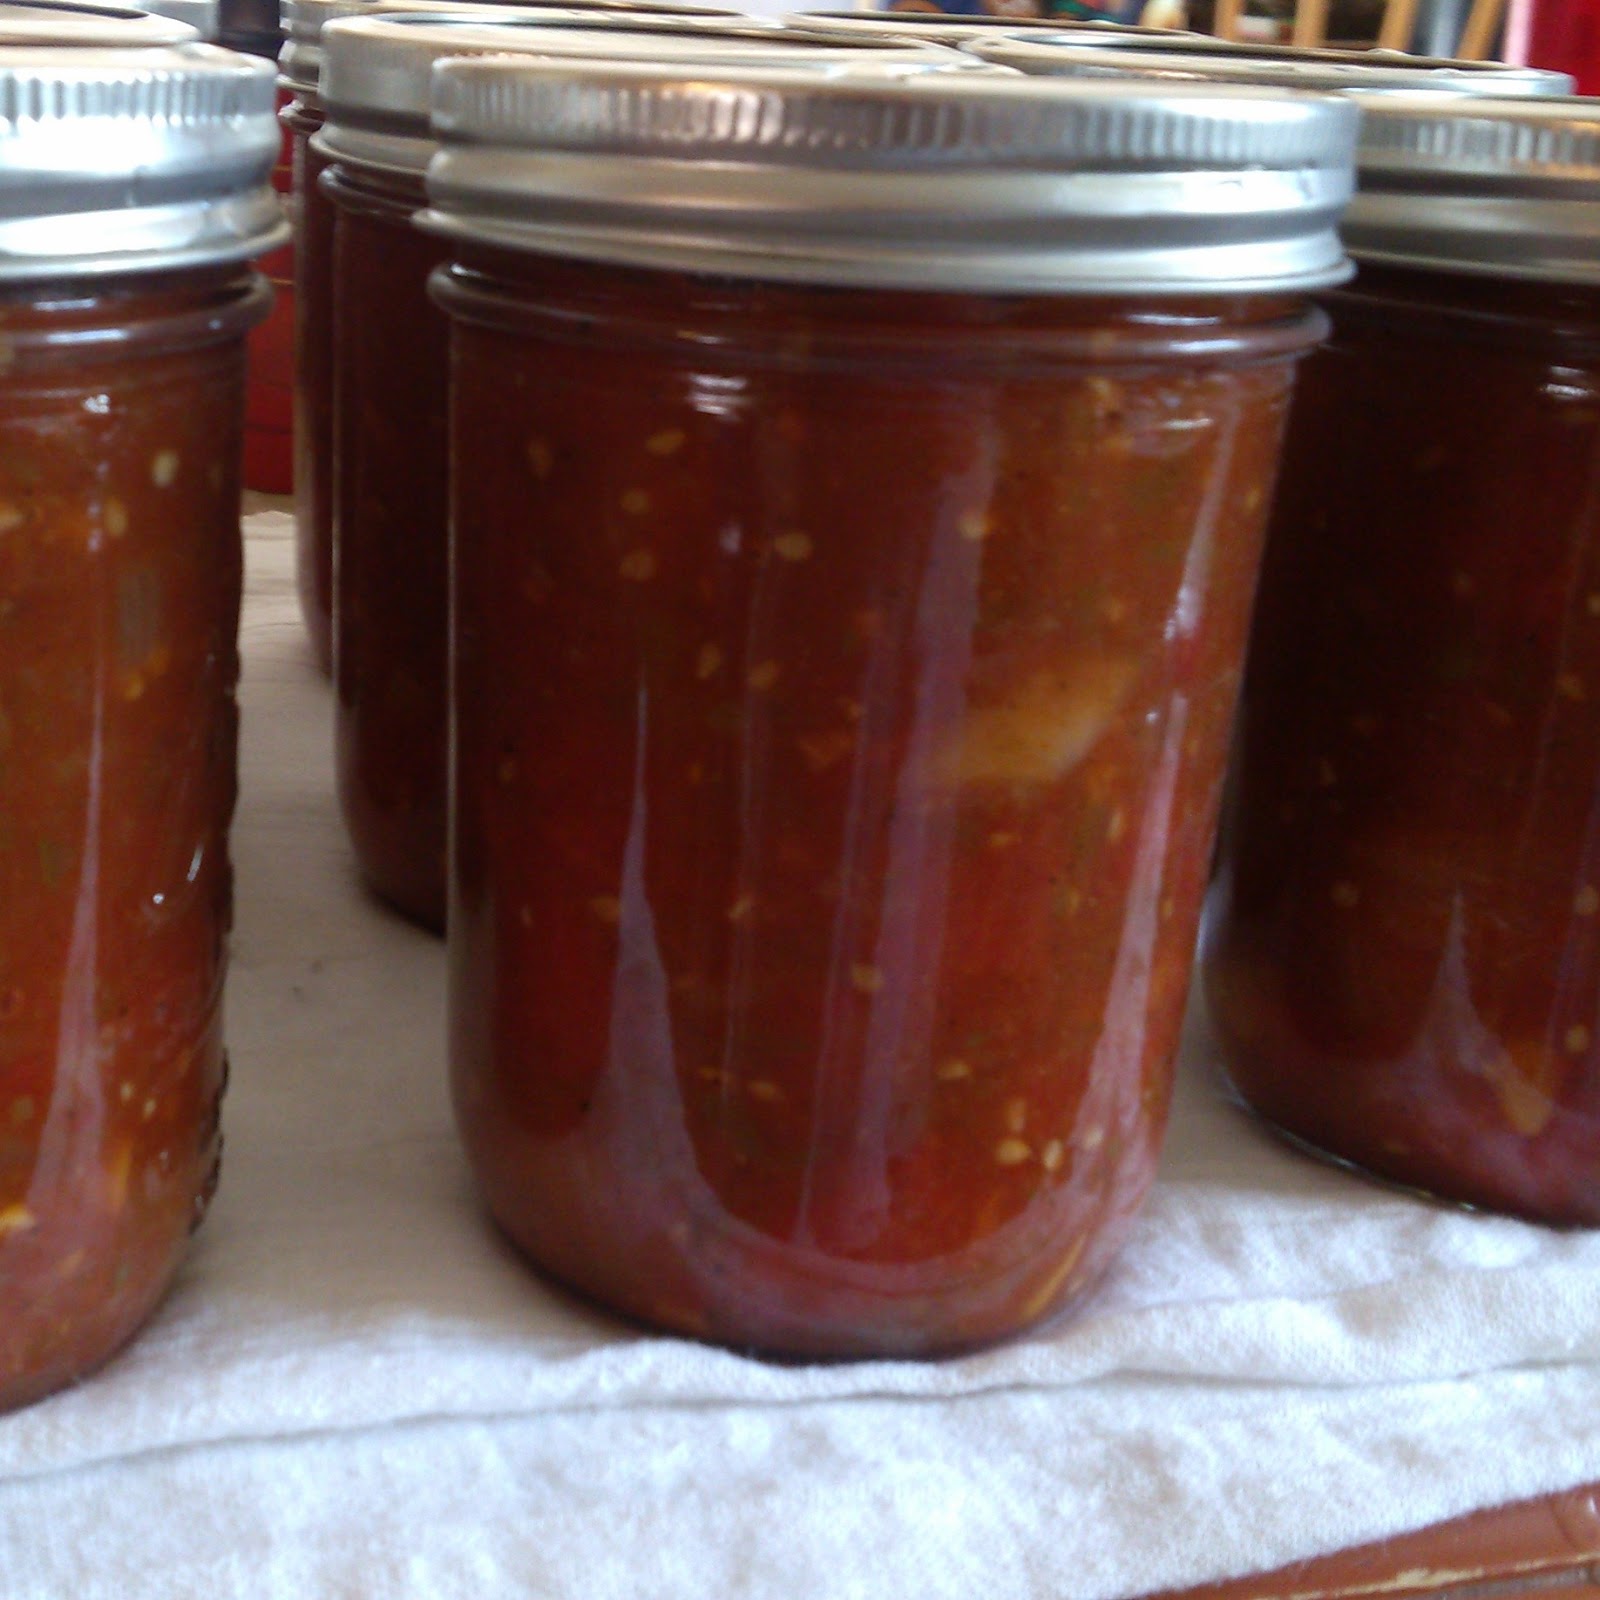
Ok I have never really done any canning with hot peppers before this salsa recipe so my first attempt I only used two large jalapeño and I took the seeds out did everything else the same. The salsa was good but a little on the sweet side and no heat. So my second try is the picture below. Everyone loved it and it was just hot enough to no you had some spicy (LOL) I was told after you refrigerate it will heat up more but haven't got to that step yet so I don't no if mine will. I would call this batch a success...

INGREDIENTS

8 cups peeled chopped tomatoes (it said to drain but I didn't also I used the blanch method to peel my tomatoes)

2 1/2 cups onions chopped (size depends on if you want it chunky or not)

1 1/2 cups green peppers (I used bell peppers I guess that’s what green peppers are?)

1 cup jalapeño pepper (I used a combo of hot peppers my son supplied from his garden)

6 garlic cloves, minced

2 tsp. cumin

2 tsp. pepper

1/8 cup canning salt

1/3 cup sugar

1/3 cup vinegar (I used white distilled)

1 (15 ounce) can tomato sauce

1 (12 ounce) can tomato paste


DIRECTIONS

(1) Mix all together and bring to a slow boil 10 minutes

(2) Seal in prepared jars and cook in hot water bath 10 minutes

(3) Makes medium chunky salsa. Cut smaller

(4) Yields 3-6 quarts or pints

Personally I wasn't real exact on my measuring. If I had more of something when I got it chopped up I went ahead and used it all. It turned out great.

Sorry everyone forgot to take pictures of the whole process


 Finished product